Instructions for Integrating PollUnit with Positly
Updated: 18, Sun, 2024 04:24 PM
Positly and PollUnit work very well together, with Positly sending pre-screened Participants to PollUnit to complete an Activity and then PollUnit sending Participants back to Positly to confirm completion and provide Feedback.
At each stage of the process, data can be dynamically shared between Positly and PollUnit using Query strings. This has several benefits:
- Pre-screened Participant attributes enrich the study with additional data.
- Pre-screening improves accuracy and helps prevent Participants from gaming the system.
- Using Query strings to receive Positly data makes data cleaning, preparation, and analysis easier (no need to fiddle around joining data)
- Using Query strings to send data to Positly enables the retargeting or exclusion of participants based on Custom attributes.
Note: Full integration requires the paid version of PollUnit.
Receiving Positly’s Participant data in PollUnit using URL Parameters
Follow these instructions to set up PollUnit’s URL Parameters to accept Positly’s participant attributes using Query strings.
- Open your PollUnit, then go to your PollUnits.
- Click Edit, then go to the Advanced tab.
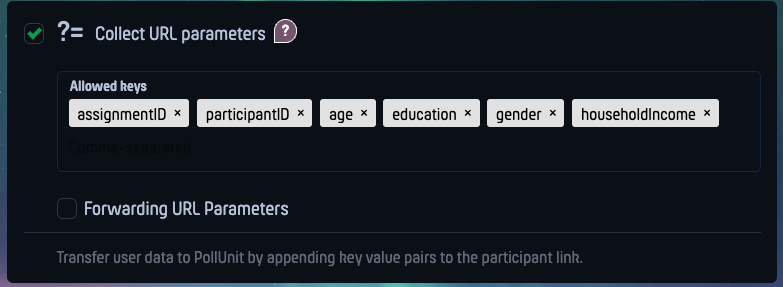
- Look for the “Collect URL parameters” option (Note that this feature might require a paid version of PollUnit).
- Type the name of the fields you want to add. The important ones are assignmentID and participantID, and then you can add whichever demographic data you need to be stored. Note that PollUnit assigns a number for each of the fields.
- Follow what we did in the screenshot below by adding:
A. assignmentID
B. participantID
C. age
D. education
E. gender
F. householdIncome

Positly will send these pieces of information into PollUnit automatically once it has been setup properly to receive them. - You can continue creating the rest of the survey questionnaire in PollUnit.
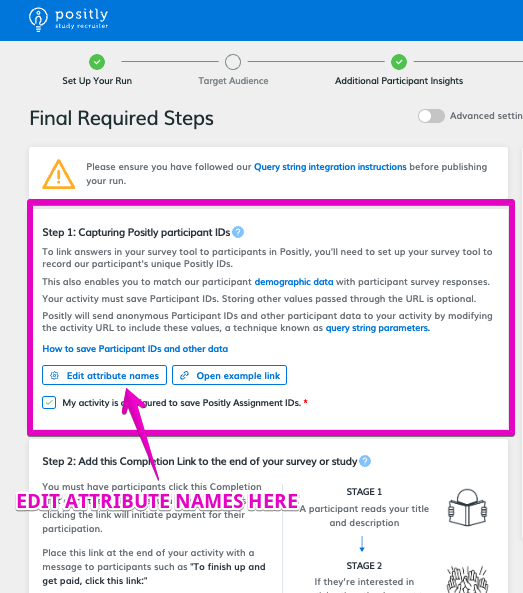
- Now it’s time to set up the Run in Positly. Open your Positly account and set up the Run as you normally do.
- In the “Final Steps” when setting up the Run, there will be an option to capture Positly participant ID and basic demographic data (See screenshot below)

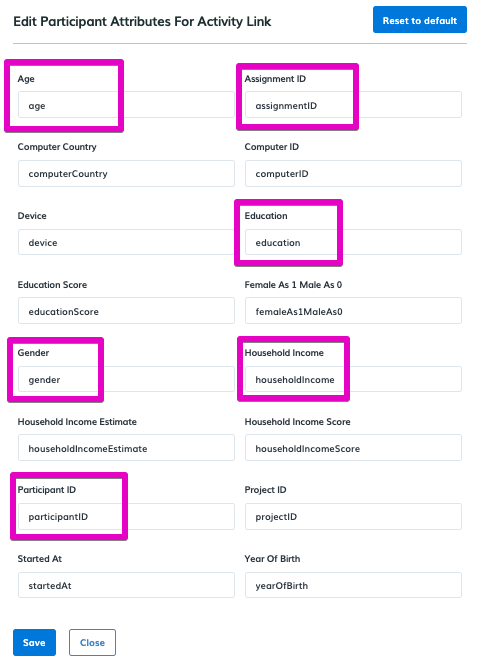
- Edit the participant attributes based on the “URL Parameters” that you set from step 5 above. In this specific case, I used the default names for all the URL Parameters. See the screenshot below.

- That’s all. You can continue completing your Run setup in Positly.
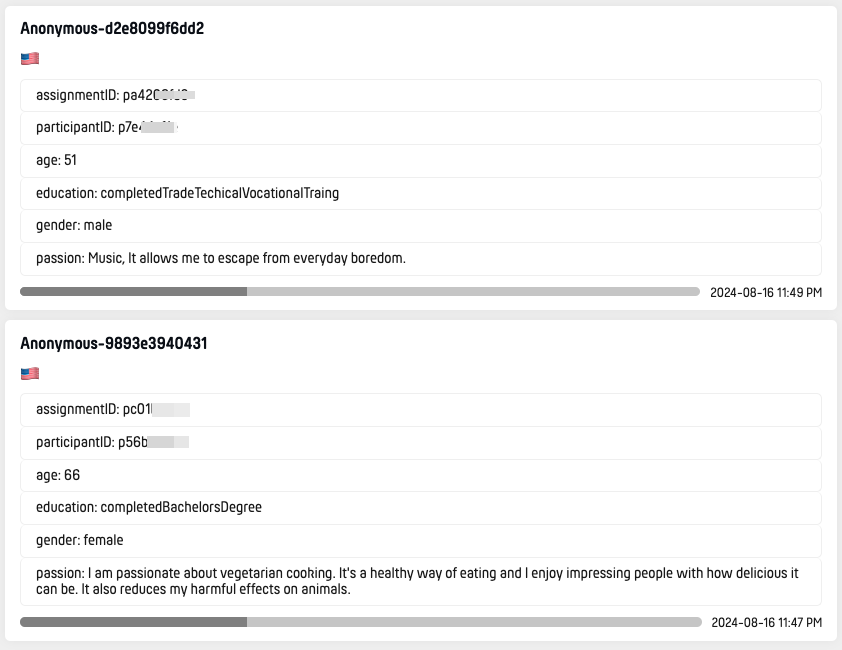
- Once the Run is complete, you should be able to see the URL Parameters data being passed to PollUnit. Please see the screenshot below.

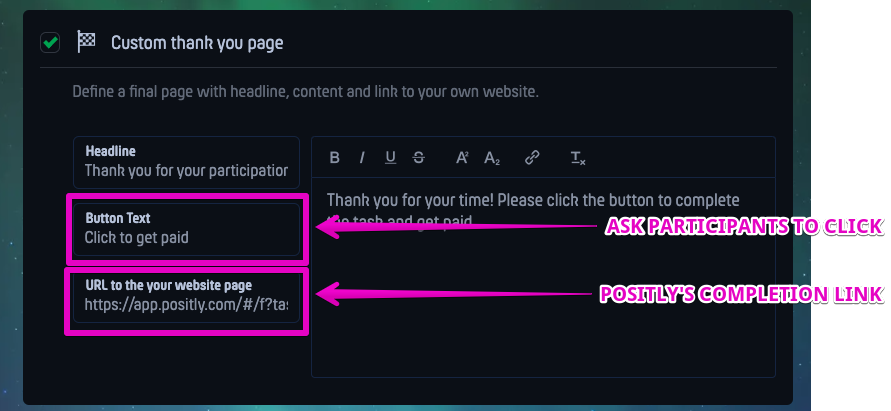
Redirecting from PollUnit to Positly’s Completion link
Successful participants will need to be redirected to Positly’s Completion link to confirm their completion using PollUnit’s Custom thank you page
- Open your PollUnit, then go to your PollUnits.
- Click Edit, then go to the Advanced tab.
- Look for the “Custom thank you page” option (Note that this feature might require a paid version of PollUnit).
- You can fill in the Headline, Button Text, URL, and text for the participants.
- Make sure you copy your Positly’s Completion Link to the “URL to your website page” field (See screenshot below)

- It will look like this to the participants on the thank you page of your survey:


Helpful?

 (No Ratings Yet)