Instructions for Integrating Pointerpro with Positly
Updated: 18, Sun, 2024 04:14 PM
Positly and Pointerpro work very well together, with Positly sending pre-screened Participants to Pointerpro to complete an Activity and then Pointerpro sending Participants back to Positly to confirm completion and provide Feedback.
At each stage of the process, data can be dynamically shared between Positly and Pointerpro using Query strings. This has several benefits:
- Pre-screened Participant attributes enrich the study with additional data.
- Pre-screening improves accuracy and prevents Participants from gaming a screener.
- Using Query strings to receive Positly data makes data cleaning, preparation, and analysis easier (no need to fiddle around joining data)
- Using Query strings to send data to Positly enables the retargeting or exclusion of participants based on Custom attributes.
Note: Proper integration requires the paid version of Pointerpro
Receiving Positly’s Participant data in Pointerpro using Intro screen hidden fields
Follow these instructions to set up Pointerpro’s Intro screen hidden fields to accept Positly’s participant attributes using Query strings.
- Open your Pointerpro, then go to your Questionnaire.
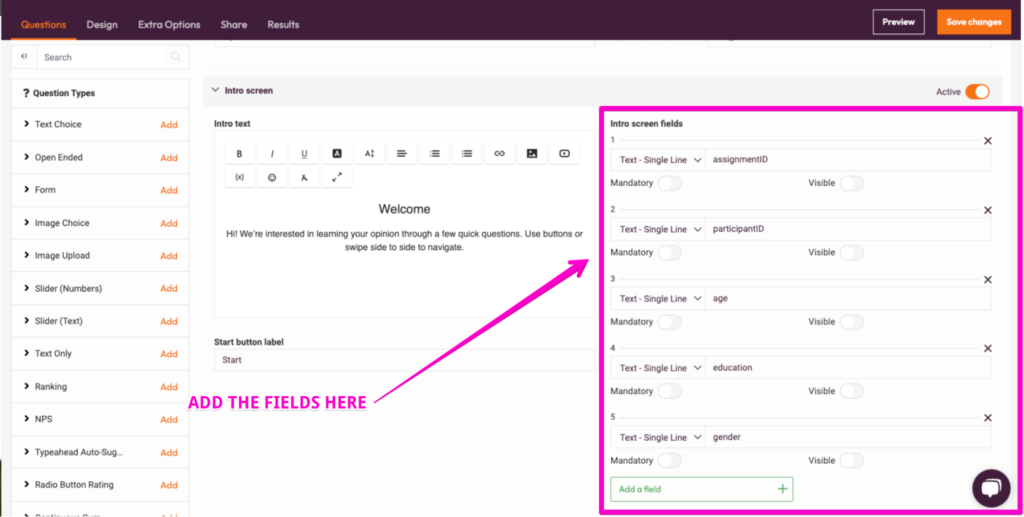
- In the Questions tab, go to the “Intro screen” section and look for the “Intro screen fields”.
- This is where you can add your hidden fields (Note that using the feature to make the fields hidden might require a paid version of Pointerpro)
- Type the names of the hidden fields you want to add. The important ones are assignmentID and participantID, and then you can add whichever demographic data you need to be stored. Note that Pointerpro assigns a number for each of the fields.
- In the screenshot below, we can see:
A. assignmentID is field 1
B. participantID is field 2
C. age is field 3
D. education is field 4
E. gender is field 5
The numbers here are important since we will refer to them again later.
- You can continue completing the rest of the survey questionnaire in Pointerpro.
- Now it’s time to set up the Run in Positly. Open your Positly account and set up the Run as you normally do.
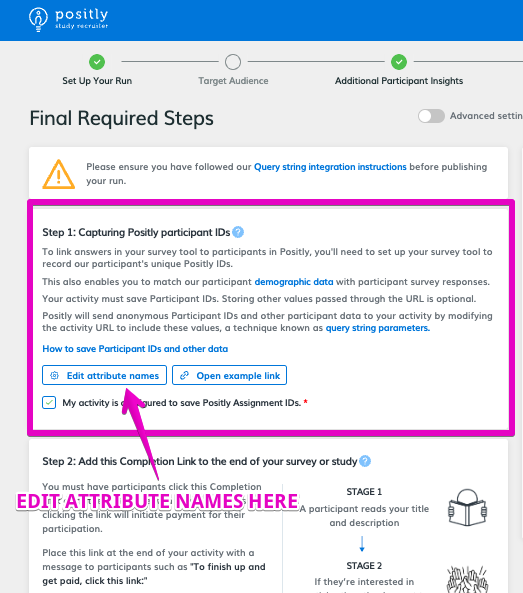
- In the “Final Steps” when setting up the Run, there will be an option to capture Positly participant ID and basic demographic data (See screenshot below)

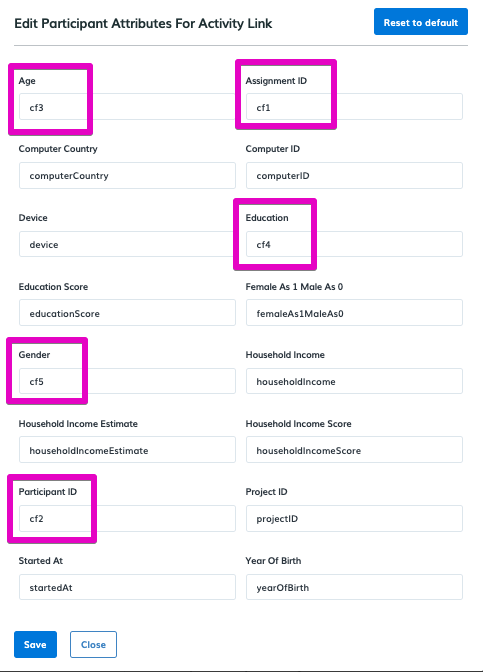
- Edit the participant attributes based on the “Hidden Fields ID” that you get from Pointerpro. In step 4 above, we get the ID from Pointerpro, and then you would need to add “cf” in front of the ID, for example:
A. assignmentID is field 1 (we write it as “cf1” in Assignment ID field in Positly)
B. participantID is field 2 (we write it as “cf2” in Participant ID field in Positly)
C. age is field 3 (we write it as “cf3” in Age field in Positly)
D. education is field 4 (we write it as “cf4” in Education field in Positly)
E. gender is field 5 (we write it as “cf5” in Gender field in Positly)Once you are done, you can click “Save”. See the screenshot below.

- That’s all. You can continue completing your Run setup in Positly.
Redirecting from Pointerpro to Positly’s Completion link
Successful participants will need to be redirected to Positly’s Completion link to confirm their completion using Pointerpro’s Final button settings.
- Open your Pointerpro, then go to your Questionnaire
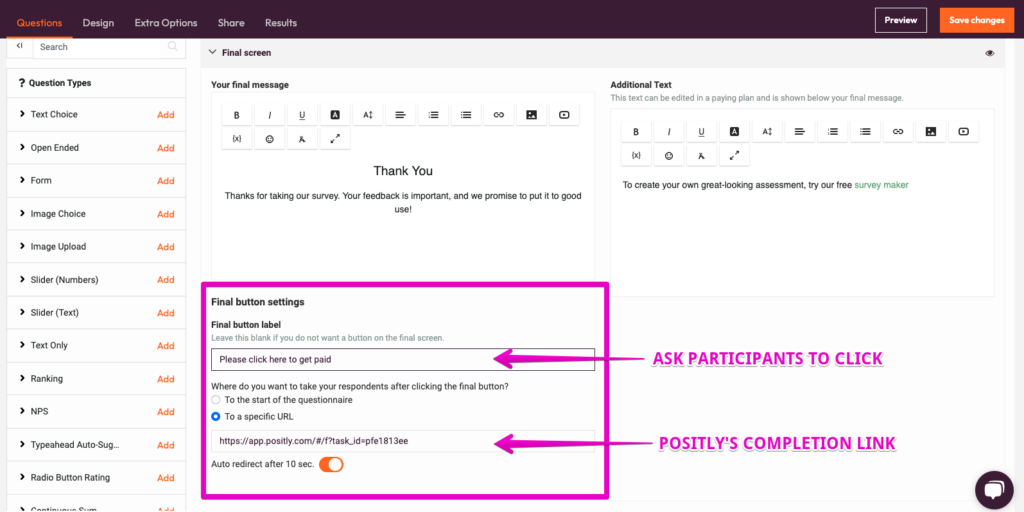
- In the Questions tab, go to the “Final screen” section and look for the “Final button settings”.
- You can fill in the label as “Please click here to get paid”.
- And set the redirect URL to your Positly’s Completion Link (See screenshot below)

Helpful?

 (No Ratings Yet)